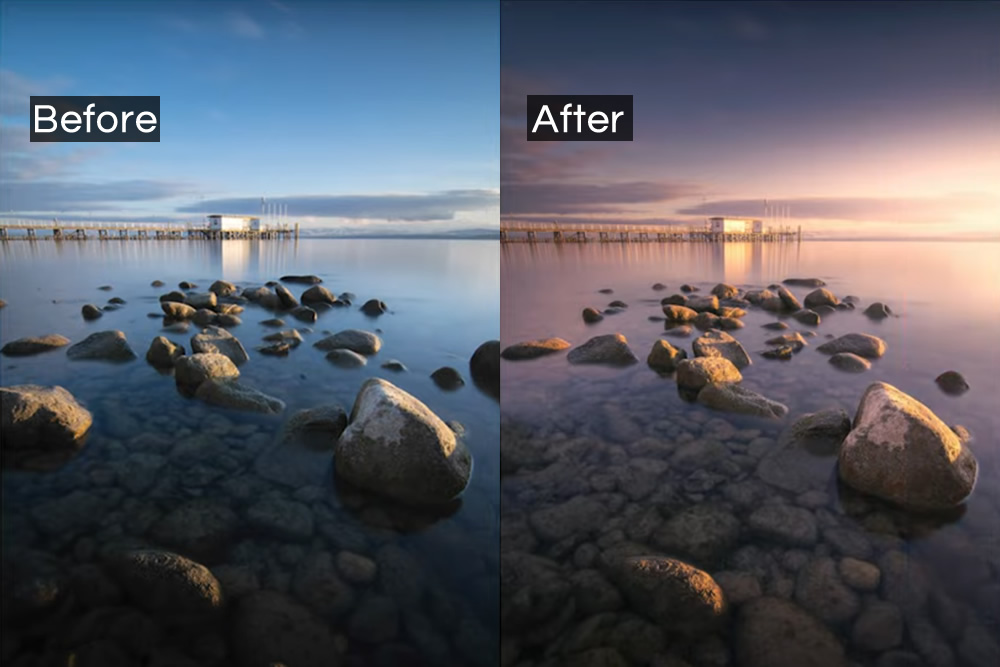
Yet another effective video tutorial from The Phlog Photography about-turn daytime photos into beautiful sunset photos with Adobe Photoshop.
You can watch this video and follow simple steps like Adjustments and Color grading in Photoshop. You can see more interesting landscape videos on The Phlog Photography Youtube Channel.
Don’t miss to check:
- 9 Great Composition Tips from Photographer Steve McCurry’s Iconic Photos
- How To Take Explosive High-Speed Photos With Smartphone
- 8 DIY Photo Filters You Can Make At Home
- 10 Simple Photo Tricks To Do At Home
Here are the flow in this vide:
0:00 Intro
My initial goal here was to just balance the exposure of the photo a little better by bringing down the highlights and raising the shadows. As the editing went on I decided to add more and more warm color tones to make it look like a sunset picture. A lot of those adjustments were made in the camera raw editor, while I used Photoshop with the nik collection plug in to finish the image.
0:23 1. Basic Adjustments
I started with the lens corrections, then switched the camera profile to Adobe landscape for more saturation. To get back details from the shadows I slightly increased the exposure. To prevent overexposure the highlights were dropped.
1:35 2. Local Adjustments
With two differently sized graduated filters overlapping the sky I made the area little darker with decreased exposure. Then, another graduated filter was added over the foreground. Here I boosted the texture and clarity. For the glow effect on the right, I used a small radial filter with increased blacks, decreased dehaze and increased exposure. In this area there is a bit of overexposure, but that’s on purpose to make this spot look extra bright.
3:20 3. Color Grading
The blue saturation was slightly dropped and for the highlights I added a very warm color tone with the split toning. The heavy color grading however was done at the end in Photoshop.
4:03 4. Photoshop
First, I wanted to clean up the photo. Here I simply used the spot healing brush and got rid of a few things. Then, I enhanced the glow some more using a soft light layer with a warm brush to paint in glow. Finally, I used the nik collection filter to apply the brilliance warmth effect for warmer colors and added a gradient map adjustment layer to further add warm tones to the highlight.
