Neil Creek has just published his new ebook 30 Tips and Tricks for Portrait Photography which is a distillation of his experience shooting portraits into wisdom that you can apply to your photo shoots today. Here he shares a little bit of that knowledge.
No matter what camera you own, or how often you take photos, you probably take photos with people in them. That’s what we find most interesting in life, and we want to capture memories of friends, family or others we get to shoot. Everyone can improve their portrait photography, and I think 30TT for Portrait Photography will help you with that!
To that end I’ve shared here three great tips and techniques – two from the book and one extra one – that will give you an idea of what you can find in my ebook. I hope you find them useful, and consider buying 30TT for just $5.
Understand Your Subject’s State of Mind
One of the difficult aspects of portrait photography is that you’re working with a person who can be experiencing a wide variety of emotions while in front of a camera. They might be shy, embarrassed, anxious, self-conscious, impatient, bored, cocky, distracted or any other kind of emotion that can hinder getting the best shot possible. To be a successful portrait photographer it helps to be part-psychologist. Understanding human emotion and behavior is a great help.
Firstly, put yourself in their shoes. Imagine how they are feeling, and what their experience of the shoot is. How would you feel in their place, and what would make you feel more at ease? Watch them closely for clues about their state of mind. Are they having a hard time making eye contact? Do they blink uncomfortably when the flash fires? Are they constantly looking at someone else for reassurance or because they are distracted? When you understand the problem getting the shot you want, then you can address it.

[Photo caption: A relaxed smile comes from a relaxed model, and keeping a friendly conversational atmosphere helps enormously.]
Generally, to help your subject feel at ease, it’s a good idea to keep talking to them. Light conversation can help ease the tension and relax your model. Talking about what you’re doing will demystify it. Giving them feedback about how they’re doing will reassure them that they’re giving you what you need. If things aren’t going well, try not to imply that they are the reason. You can ask them if they’re comfortable, and if not ask what you can do to help. It’s better to say “This pose/lighting isn’t working” and move on than to make them think that they aren’t doing a good enough job. If they were anxious before, they will be doubly so. Positive feedback inspires confidence and will help greatly to capturing a better photo. As mentioned previously, showing your model the photos on the back of the camera occasionally can help reassure them that the shoot is working and give them confidence in their appearance.
It’s also a good idea to sometimes try being on the other side of the lens. Offer to pose for photographer friends, and you will gain a greater insight into what it’s like for your models.
Learn to See Curves and Lines
So much of photography is about curves and lines, in composition and especially in portraiture. We see not only with our eyes, but also with our brains, and a critical part of the tools our brain uses to make sense of a visual scene is curves and lines. From the position and shape of these lines, our brain makes assumptions about the three dimensional shapes of the actual object in the real world.
For example — and this is a classic technique that you will find yourself using a great deal — by turning the model’s body slightly to the side, and putting their hand on their hip, the gap shown between the arm and the back emphasises the curve of the back and makes them look slimmer. If their arm is hanging down their side, then the brain doesn’t see a line at the back, and it appears to make the whole body look wider. Obviously, the model hasn’t become slimmer in the seconds it takes to change their pose, and we know that logically, but nonetheless, we perceive them as looking slimmer, because we can see that line.
This is one example of many situations where changes to the shape and composition of the lines and curves of the body can change our perception of your model. It’s not logical, but it makes a great difference in how the photos appear to us, and the impression they make on us. It’s difficult to learn, but it’s something that you will pick up over time as you add one technique after another to your mental toolkit learned from experience by shooting often.

[Photo caption : Renee’s curves can be shown at their best with the right pose.]
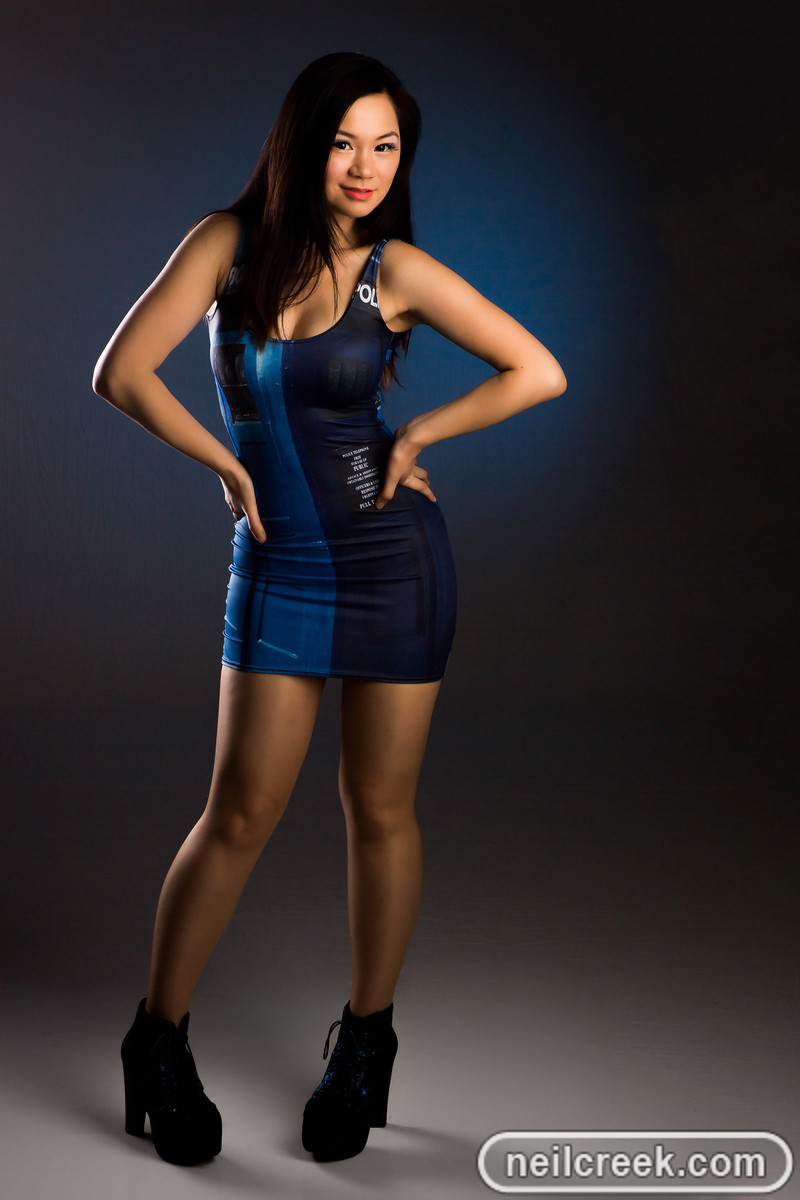
[Photo caption : Connie’s curvy figure is accentuated by the classic ‘S curve’ pose.]
Watch For and Correct ‘Raccoon Eyes’
The direction of light helps define the shape of a subject by determining the position and shape of shadows. On a face the nose is a good example. One area that can be a problem with shadows is under the brow.
In the human face, the eyes are slightly sunken, and the brow protrudes. This means that whenever the main source of light is high or above your subject, the brow will cast a shadow on the eyes. The effect of having two dark circles where the eyes are looks similar to the fur colouring of a raccoon, thus the nickname for this problem. As the eyes are typically the most important part of a portrait photo, it’s equally important that they are well lit, and not disappearing into darkness.
There are a few ways you can deal with this:
- Move the subject under shade. By stopping the light coming from mostly overhead, the ambient light in the environment will fill in the eyes, making them far easier to see.
- A reflector or a piece of white paper or card can be used to reflect some light back into the eyes to illuminate them.
- Using another light source, such as a flash to directly illuminate the face to fill in the shadows.
- Holding a diffuser over the subject, to turn mostly directional overhead light into a much larger diffuse light source, which is more able to get under the brow the light the eyes.
- If the contrast isn’t too great, selectively lightening the eye area in post processing can help.
Another advantage of reducing the effect of brow shadowing is getting something brighter reflecting in the subject’s eyes. These “catchlights” help bring the subject’s eyes to life and make for a much more pleasing photo.
