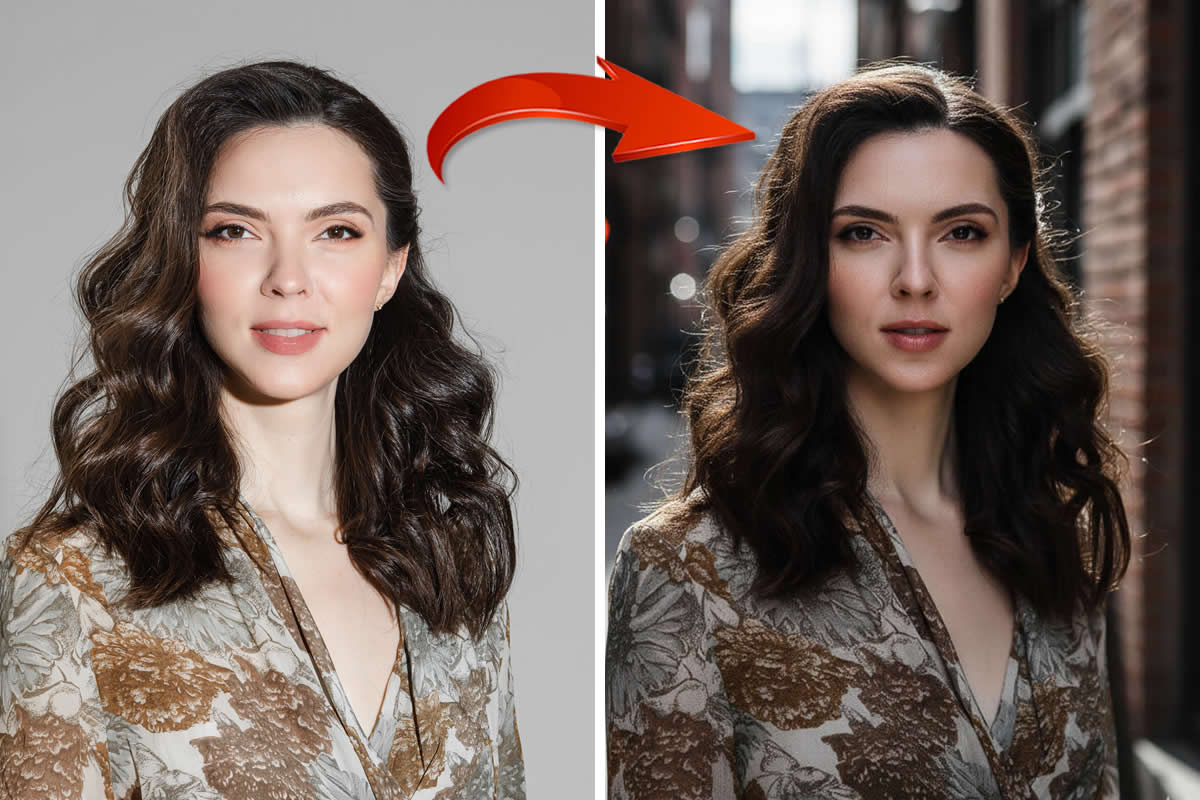
You may often need to change the size of low-resolution photos. When you upload such photos to certain websites or want to print them out, their pixels may become distorted. It makes the photos blurry. If you are wondering how to improve picture quality, we suggest using one of the following three ways.
The first way is simpler, so it is suitable not only for experienced but also for novice photographers: apply Photoshop actions. Using this method, you will get a stylish and professional-looking picture in a couple of clicks.
The second way is to alter picture quality in Photoshop using various tools and filters. You will be able to control the entire process and the final result will depend only on you.
The third way to enhance photo quality is to use professional photo optimizers that compress pics. With their help, you will reduce the picture size without losing quality.
Way 1 – Improve Picture Quality Using Photoshop Actions
Before compressing pictures, you should edit them in Photoshop. In this case, we suggest applying Photoshop actions for color correction. Many novice photographers use photo enhancement freebies to achieve professional-looking shots. Experienced photographers use these plugins for basic picture editing, more complex manipulations and picture retouching.
How to install and use Photoshop actions?
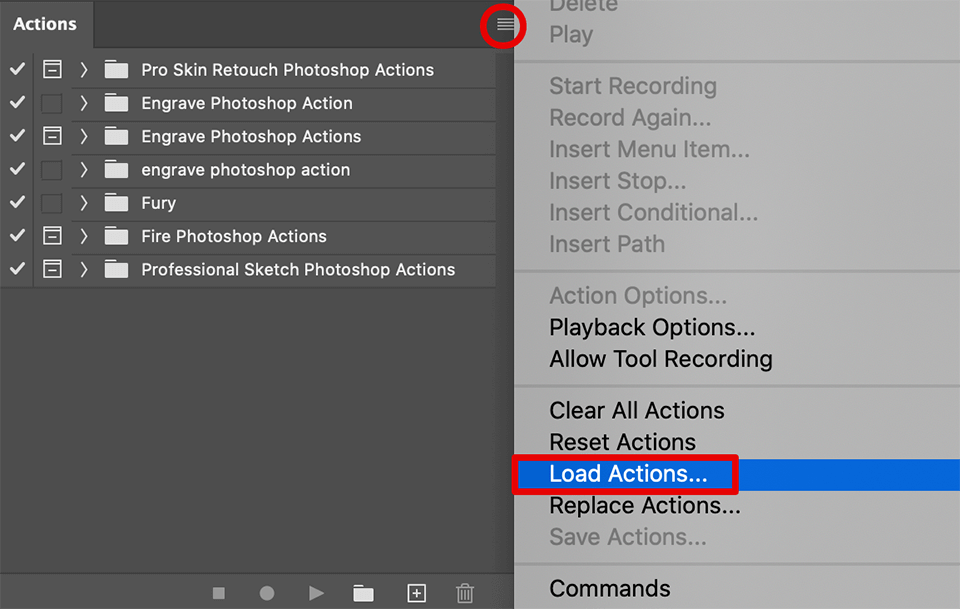
- Open the Actions window.
- Press Alt + F9 shortcut or go to the Window tab > Actions.
- In the Actions tab, start installing the .ATN files.
- Find the button with four bars, click on it and pick Load Actions.
- Locate the required actions on the PC and choose Open. As a result, you will save all the loaded actions in one list.
BONUS: Professional Photoshop Actions Bundle

With this bundle of 846 professional actions, you will effortlessly increase photo quality. It covers a vast array of styles and genres of photography, from black and white to HDR, whether it is a portrait/group photo or shots taken indoors or outdoors in poor lighting conditions.
These actions are presented in high-resolution JPG or RAW file formats. The file type is ATN. They are compatible with Adobe Photoshop CS3 and higher, Creative Cloud, and any other software that allows for working with layers.
Way 2 – Improve Picture Quality Using Photoshop Photo Editor
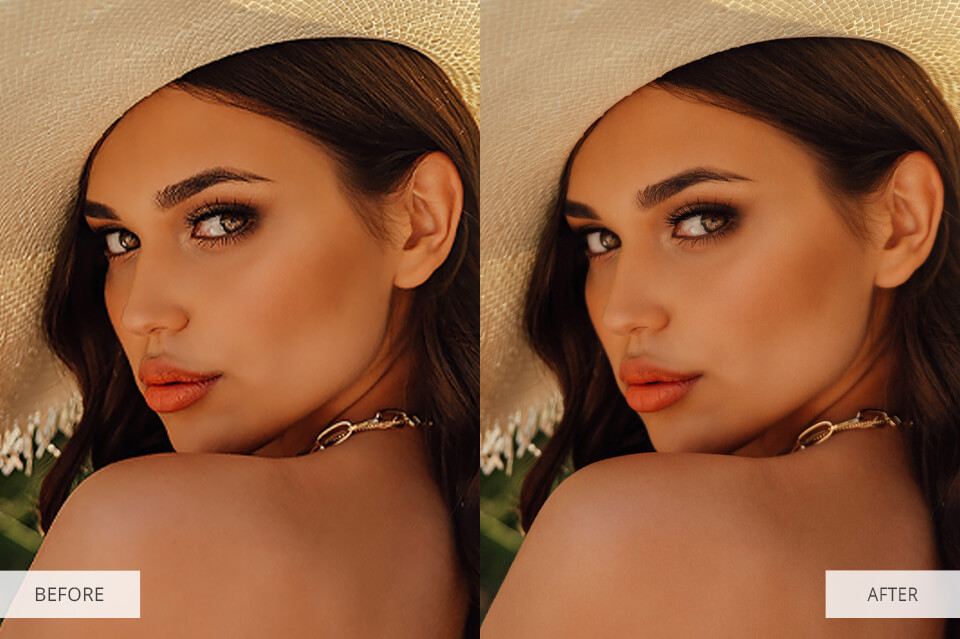
To make pictures better quality in Adobe Photoshop, ensure that you have this software installed on the PC and prepare the picture for further editing.
Step 1. Open a Photo
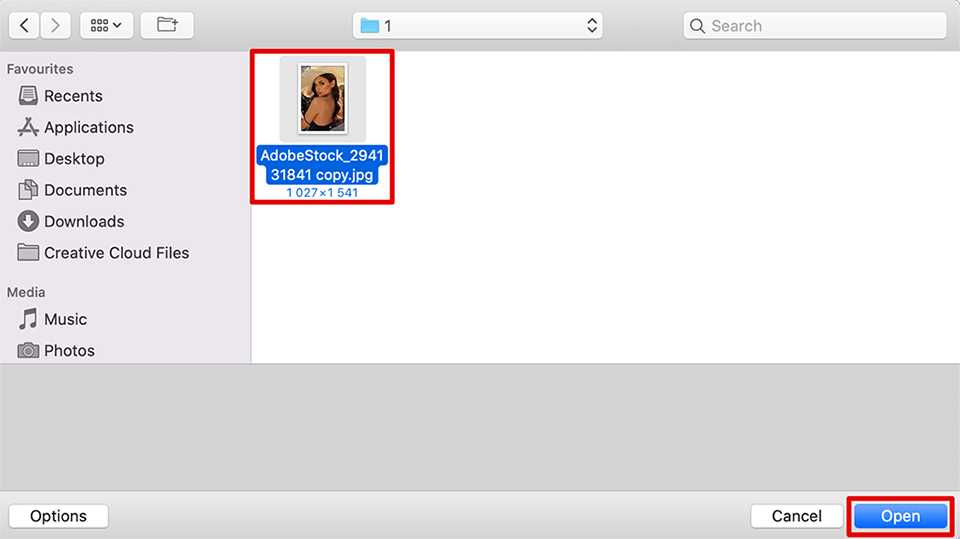
To open a picture you wish to edit in Photoshop, navigate to File > Open and pick a picture from the PC.
Step 2. Resample Image
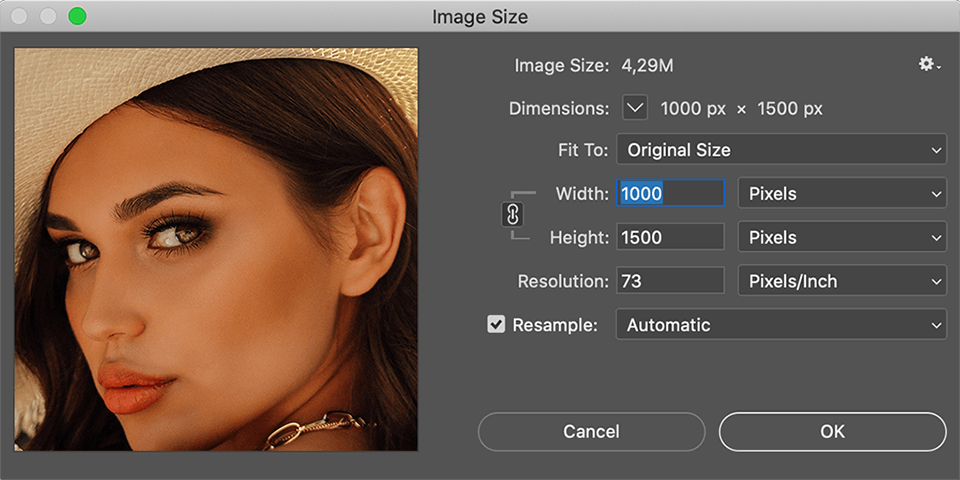
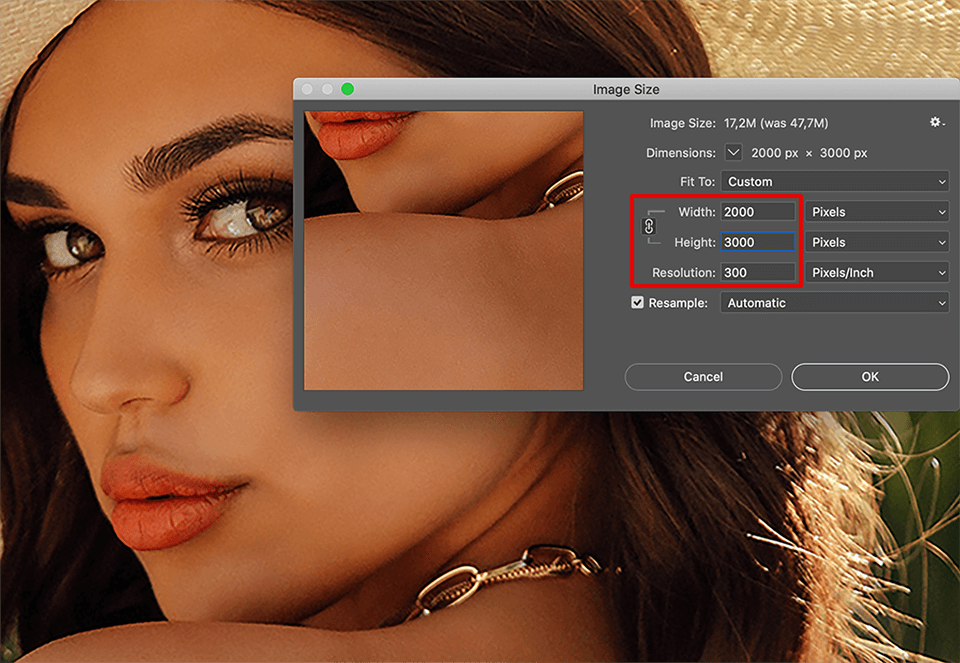
Pick the picture size from the drop-down list. If you need to preserve the same image size, click the Resample Image option. Another option is to preserve the shared pixels of the picture. In this case, you will need to uncheck the box to scale the picture. This will automatically alter the height and width values.
Step 3. Increase Image Resolution
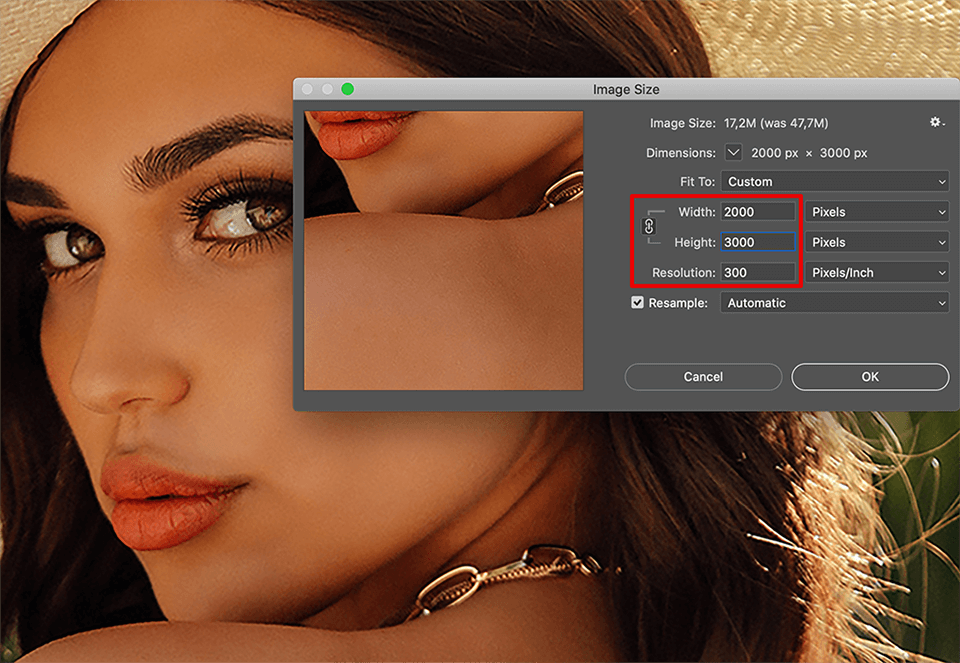
If you wish to increase the resolution of a picture in Photoshop or the number of pixels per inch in the picture, enter the height and width of the picture so that its pixels are preserved.
Then click OK to get a high-resolution picture. But if you aren’t happy with the result, follow the next steps.
Step 4. Use the Reduce Noise Filter
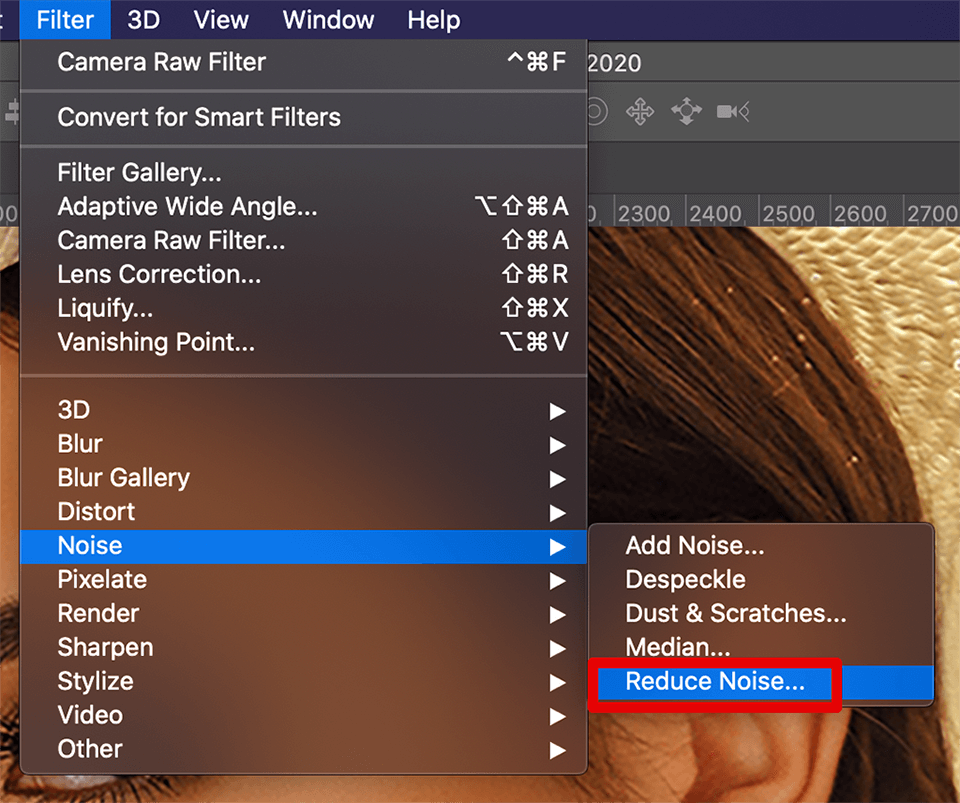
Find Filter > Noise in the menu. Then pick Reduce Noise from the drop-down list.
Step 5. Adjust the Noise Reduction Settings
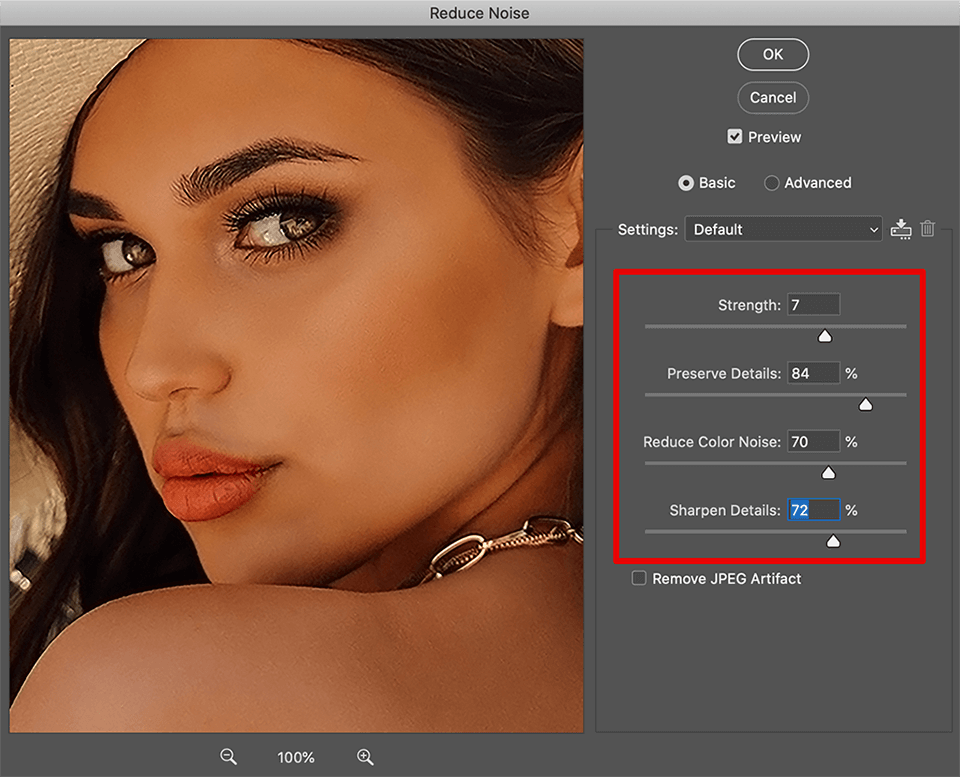
Before you begin adjusting settings, tick the Preview checkbox in the upper-left part of the filter window to see the changes in realtime. Then drag the sliders to adjust the filter settings. Now we will go over the sliders in more detail:
- Strength: this value indicates the desired degree of noise reduction. The value should be higher for low-quality JPEGs. Drag the slider to the right to see how the intensity of the effect is increased.
- Preserve Details: a lower percentage will make the picture more blurry and softer but also reduce more noise.
- Sharpen Details: you can compensate for the low value of Preserve Details with a higher value of Sharpen Details. This will make the edges of the picture clearer.
- Tick the Remove JPEG artifact checkbox. This setting tries to remove mosquito noise and blocking artifacts that occur when saving JPEG pics in compressed format.
Once you are satisfied with the preview picture, click OK to save the new picture.
Step 6. Use the Clone Stamp Tool in Areas with More Texture
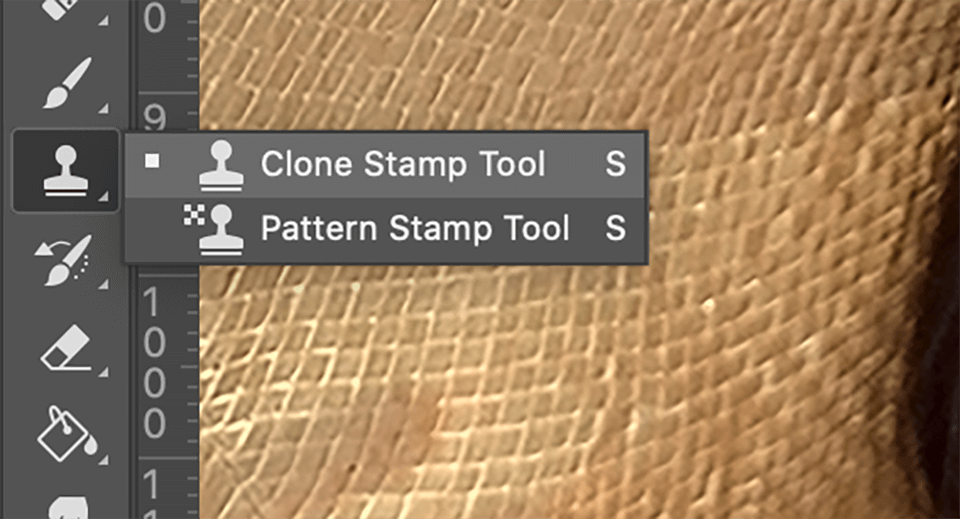
The Clone Stamp Tool is useful for rough textures, such as leather, drywall and bricks. Instead of using a single color, the Stamp tool selects a texture and then applies the texture to defects, spots and marks. To use the Clone Stamp tool to fix flaws in a picture, click the rubber stamp icon on the toolbar on the left.
Then click the circle icon (or the selected brush type) above the toolbar on the left to open the Brush menu. Set the stiffness to 50% or less, and the opacity to 100%. If necessary, click “[“and “]” to alter the brush size.
Hold down Alt on PC or Option on Mac and click the area next to the spot to take a texture sample. Click once on any spot or blemish. Repeat these steps for all other spots and pimples, creating a new texture for each click.
Step 7. Save the Picture
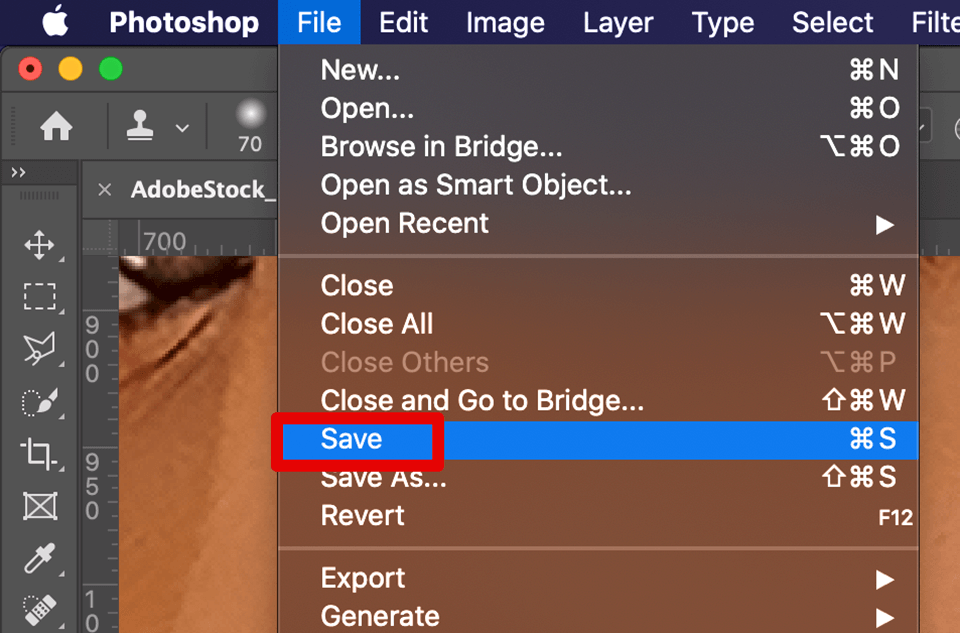
After you finish editing the picture, click File > Save as. Enter the picture name next to the Filename. Pick JPEG or PNG from the drop-down menu next to File Format and click Save.
Way 3 – Improve Picture Quality Using Photo Optimizers
Professional photo optimizers help you compress any picture or change its filetype while maintaining its quality. When pictures retain their full size, the loading time increases, which makes it difficult to work. That’s why it is important to reduce the size of pictures for faster loading.
1. Optimizilla
This online picture optimizer uses a smart combination of the best optimization and lossy compression algorithms to compress JPEG and PNG pics to the smallest possible size while maintaining the required level of quality.
Upload or drag up to 20 pictures. Wait for the compression to complete. Click on thumbnails in the queue to adjust the quality. Use the slider to control the compression level and use the mouse/gestures to compare pictures.
2. RIOT
With RIOT, you can batch compress multiple pics of GIF, PNG and JPEG file formats simultaneously. RIOT offers an intuitive interface that lets users compare the original picture with the optimized one in real time and instantly see the size of the resulting file. You need to download the app and upload pics. After compression, compare the result with the original picture and download its modified version.
Now you know how to improve picture quality using Photoshop or picture optimizers. If you don’t want to waste your time and effort but wish to get professional and realistic results, approach a photo enhancement service that costs only $5 per image.

