In this tutorial I will explain step by step how to create a The Faded Antique Look in Adobe Photoshop CS5. Let’s get started!
Step 1
Start with the photo you want to apply the technique, Open in Photoshop.

Step 2
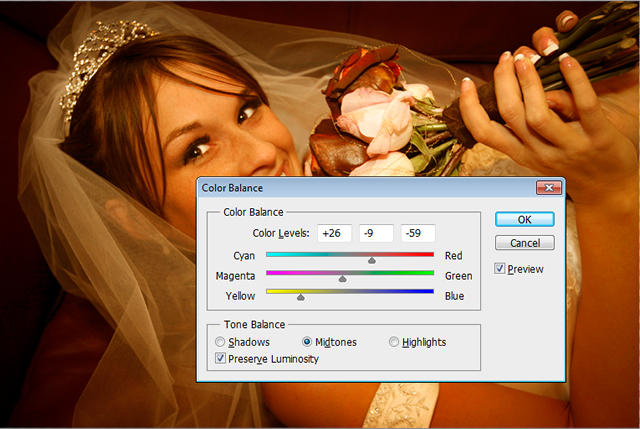
First, you’re going to add a very warm, yellowish tint to the image. Go to Image >> Adjustments >> Color Balance. When the dialog appears adjust the tones as below.
Step 3
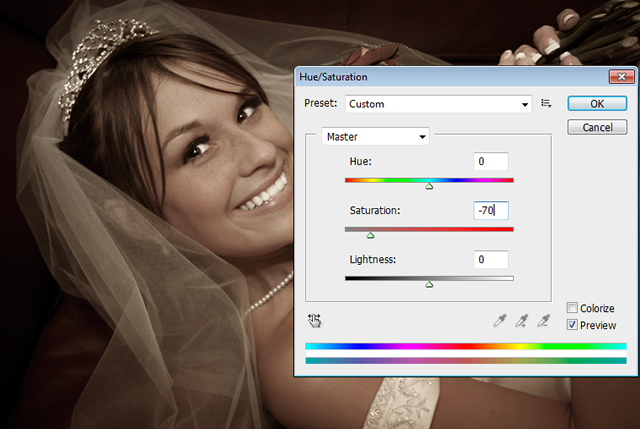
Now, you need to desaturate the colors a bit. Go to Image >> Adjustments >> Hue/Saturation. When the dialog appears adjust the tones as below.
Step 4
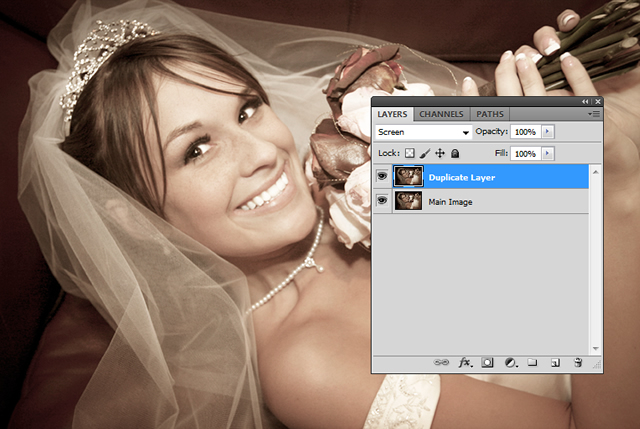
Now, Duplicate the Main Image Layer, then change the blend mode to Screen, which makes the whole photo very bright and blown out. Now Flatten the two layers (Main Image + Duplicate Layer).
Step 5
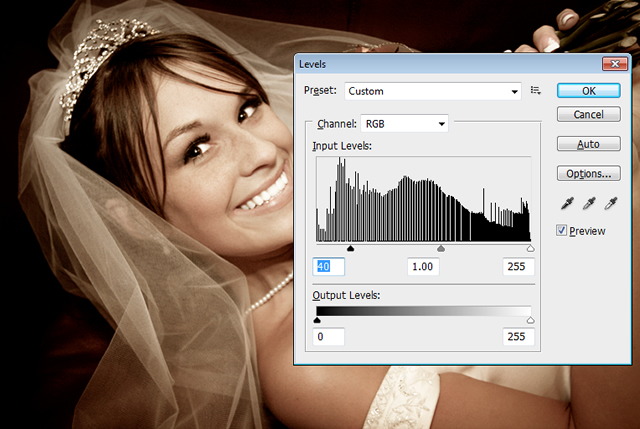
Now you can adjust the Levels little bit. Go to Image >> Adjustments >> Levels and adjust as below.
Step 6
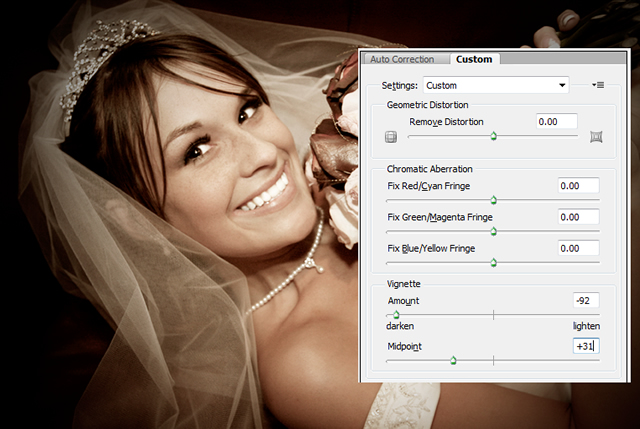
Now you are going to darken the edges. Go to Filter >> Lens Correction and press the Custom tab. Under that Adjust the Vignette. The values are Vignette Amount is -92 and Midpoint +31 and press OK. Please remember, the adjustments will vary according to photo.
Step 7
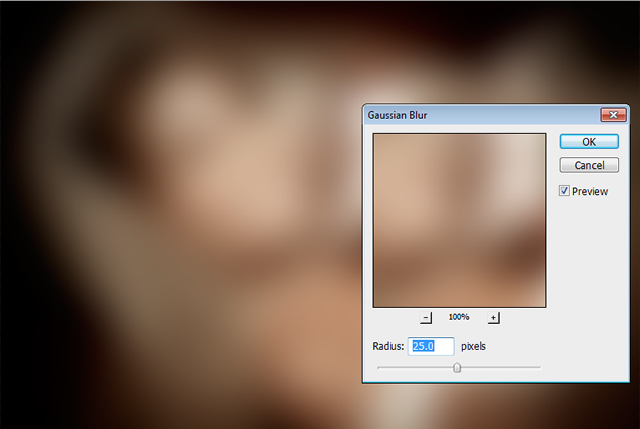
The Final Step is, Duplicate the layer and go to Filter >> Blur >> Gaussian Blur and enter 25 Pixels.
Step 8
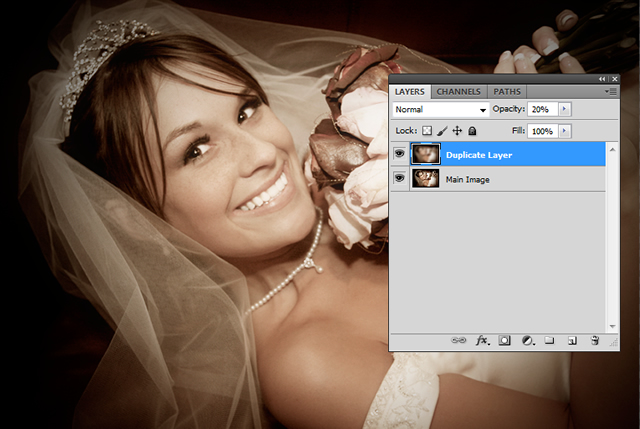
Now you can adjust the opacity of Duplicate layer to 20 as below. We’re done with The Faded Antique Look.
Before and After
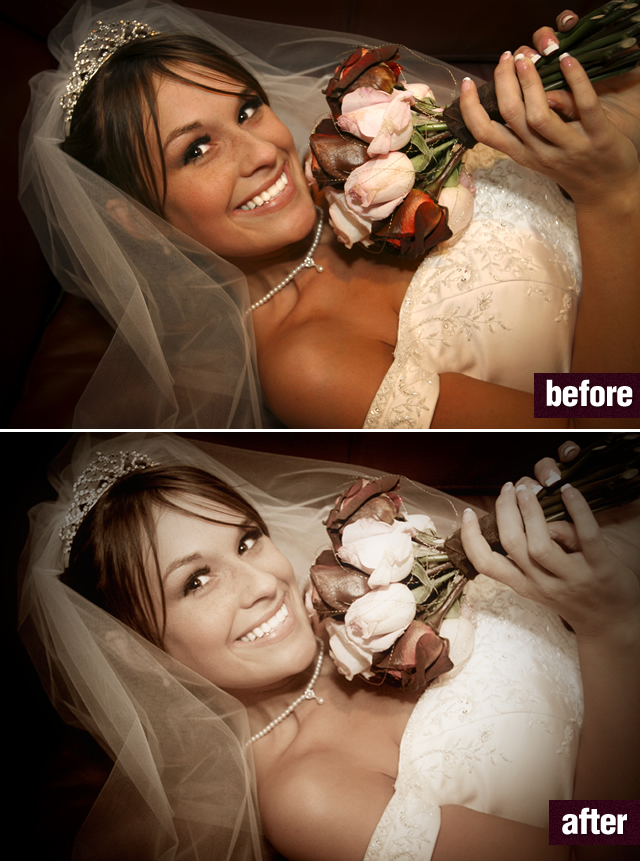
Photo from Istock
Like the Tutorial? Be sure to subscribe to our RSS feed, follow us on Twitter and Facebook to stay up on recent content.


2 comments
Very well organized and pointed tutorial. Nice sharing.
Very good tutorial.. love the final output.