121clicks.com
  • Inspirations
  • Showcases
  • Photo Stories
  • Others
    • Tutorials
    • Art
    • Articles
    • Interviews
    • Animals
    • Funny
    • Design
  • Pages
    • About 121Clicks.com
    • Contact Us
    • DMCA REMOVAL
    • Privacy
No Result
View All Result
121clicks.com
  • Inspirations
  • Showcases
  • Photo Stories
  • Others
    • Tutorials
    • Art
    • Articles
    • Interviews
    • Animals
    • Funny
    • Design
  • Pages
    • About 121Clicks.com
    • Contact Us
    • DMCA REMOVAL
    • Privacy
No Result
View All Result
121clicks.com
No Result
View All Result

Creating an Infrared Photo Effect in Photoshop CS5

121clicks by 121clicks
September 23, 2012
in Tutorials
4
Creating an Infrared Photo Effect in Photoshop CS5
Share on FacebookShare on Twitter

Creating an Infrared Photo Effect in Photoshop CS5

In this tutorial I will explain step by step how to create a The Infrared Photo Effect in Adobe Photoshop CS5. Know more about Infrared Photography here.

Let’s get started!

Step 1

Start with the photo you want to apply the technique, Open in Photoshop.
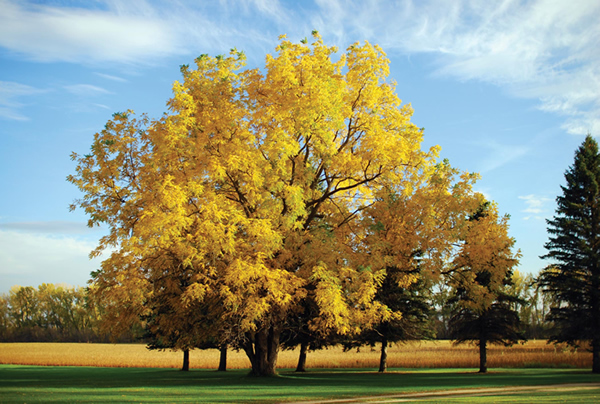
Creating an Infrared Photo Effect in Photoshop CS5

Step 2

Duplicate your Original Layer as below:
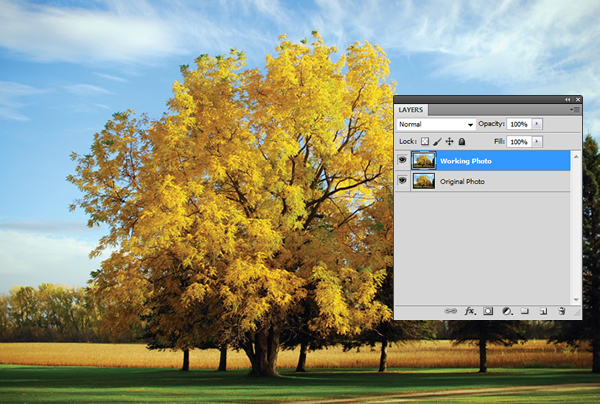
Creating an Infrared Photo Effect in Photoshop CS5

Step 3

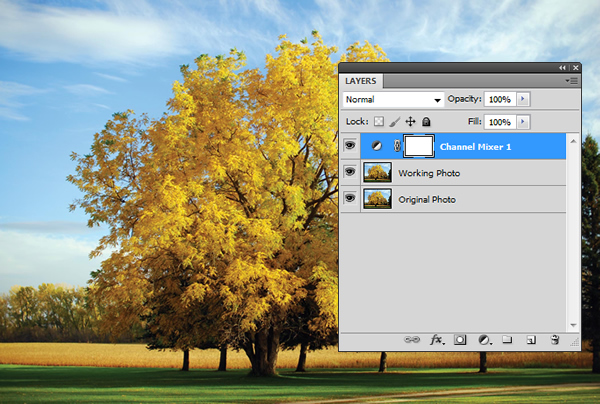
On the right hand side Adjustments panel, click the Channel Mixer button. Please check the below screenshot.
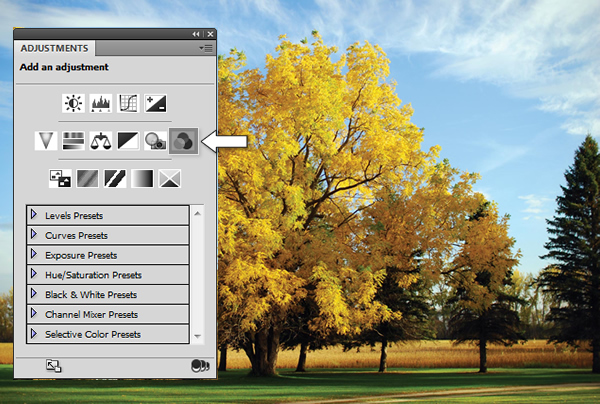
Creating an Infrared Photo Effect in Photoshop CS5

Now, the layer panel should be like below:
Creating an Infrared Photo Effect in Photoshop CS5

Step 4

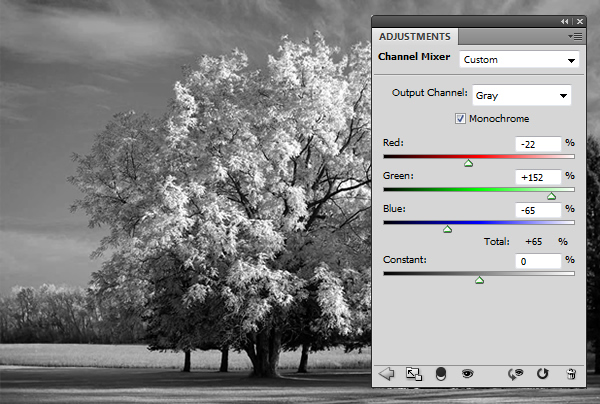
Now in the Adjustment panel, Check Monochrome to convert the photo to grayscale. Move the Green slider almost all the way to the right to lighten the greens, move the Red slider slightly to the left or right, and move the Blue slider to the left. The aim is to create contrast between the light greens and the other colors. We’ve gotten good results by keeping the Total of the three sliders. Check the below screenshot and adjust accordingly.
Creating an Infrared Photo Effect in Photoshop CS5

If you also want to darken the entire photo, drag the Constant slider to between –1 and –5.

Step 5

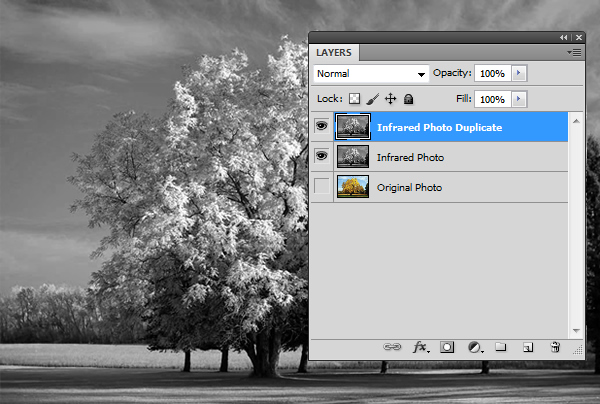
Select the visible adjustment layer, then press Ctrl-E/Cmd-E to merge it with the duplicate of the Background.
Creating an Infrared Photo Effect in Photoshop CS5

Step 6

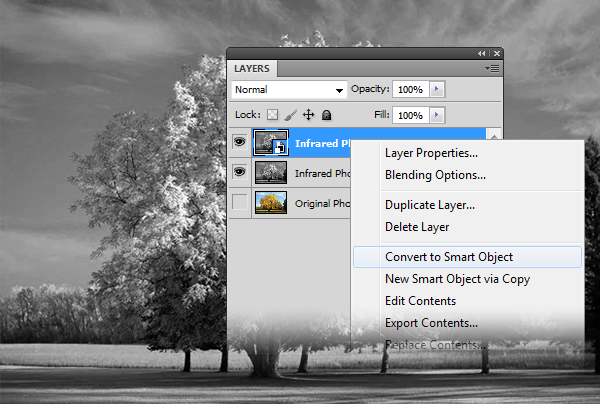
Right-click/Control-click the duplicate layer and choose Convert to Smart Object. This conversion will enable the filter that you’re going to apply next to remain editable.
Creating an Infrared Photo Effect in Photoshop CS5

Step 7

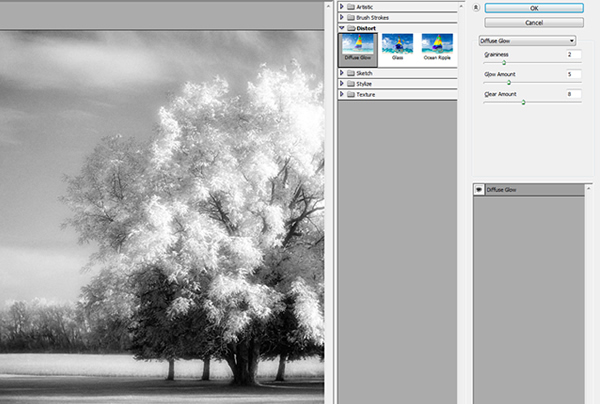
To simulate the glow that infrared photos develop (due to the requisite long exposure times), choose Filter > Distort > Diffuse Glow.

In the Filter Gallery, we chose these settings for the Diffuse Glow filter: Graininess 2; Glow Amount 5 (to create a glow without clipping too many highlights); and Clear Amount 8 (to lighten the entire photo). Press OK.
Creating an Infrared Photo Effect in Photoshop CS5

Step 8

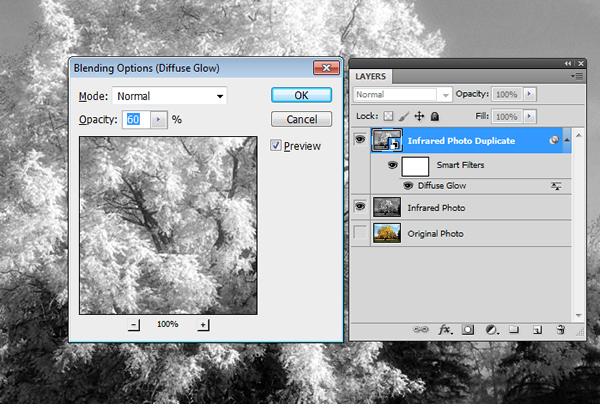
In the Blending Options dialog, we lowered the Opacity for the Diffuse Glow filter to restore some detail to the highlights. Here you can play with different modes and opacity, until you satisfy with your image.
Creating an Infrared Photo Effect in Photoshop CS5

Final Step

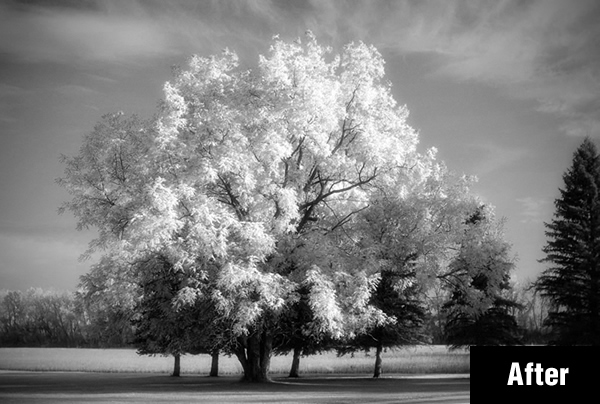
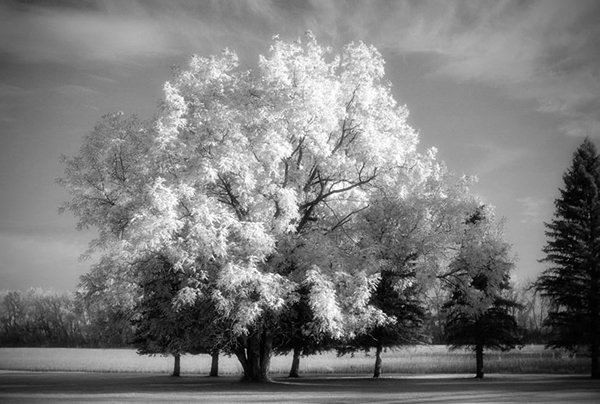
Now, we are done with editing the image. If you want to add some vignette and adjust some levels for details you can do it here. The Final Image is below.
Creating an Infrared Photo Effect in Photoshop CS5

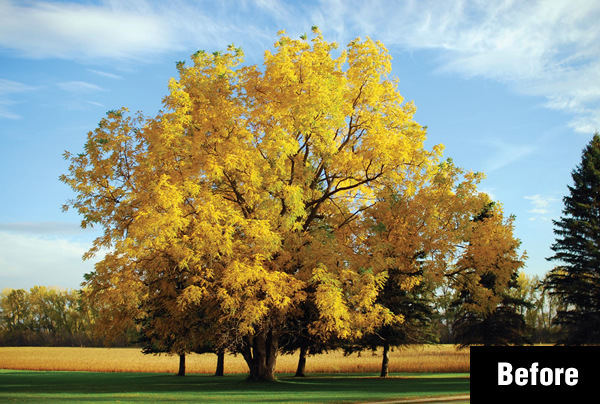
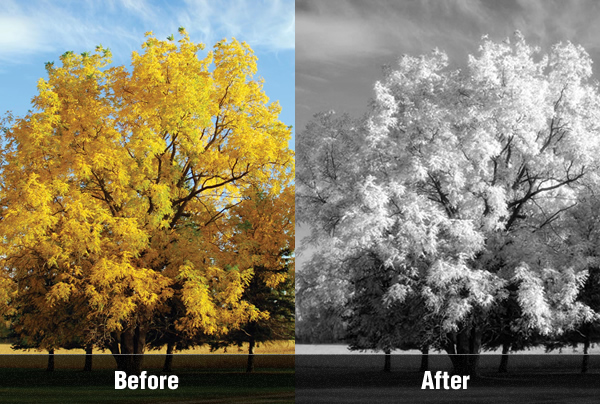
Before and After

Creating an Infrared Photo Effect in Photoshop CS5

Creating an Infrared Photo Effect in Photoshop CS5

Image Source: IStockphoto

Like this Tutorial? Be sure to subscribe to our RSS feed, follow us on Twitter and Facebook to stay up on recent content.

Tags: Infrared PhotographyLearning & TutorialsPhotoshop & Post ProcessingPhotoshop TutorialsPost Processing
Previous Post

Interview with Nature & Wildlife Photographer Ganesh H. Shankar

Next Post

Showcase of the Week – Peter Levi

Related Posts

Gemini AI Prompts for Portraits
Inspirations

The ‘DSLR Look’ on Your Phone: 5 Gemini AI Prompts to Nail Professional Clarity and Bokeh

...

by Venkat Prakash
October 10, 2025
BigPicture Natural World Photography Competition 2025 Winners
Tutorials

26 Remarkable Winning Photos from the 2025 BigPicture Natural World Photography Competition

...

by 121clicks
June 18, 2025
Tips for Minimalist Landscape Photography to Reveal Beauty in Simplicity
Inspirations

10 Tips for Minimalist Landscape Photography to Reveal Beauty in Simplicity

...

by 121clicks
May 28, 2025
Make Events More Fun with Photo Shoots
Tutorials

6 Ways to Make Events More Fun with Photo Shoots

...

by 121clicks
May 15, 2025
Commercial Photography A Game-Changer for Your Business
Tutorials

Commercial Photography: A Game-Changer for Your Business

...

by 121clicks
May 10, 2025
Common Wedding Videography Mistakes to Avoid on Your Special Day
Tutorials

Common Wedding Videography Mistakes to Avoid on Your Special Day

...

by 121clicks
April 25, 2025
How to Take Amazing Photos for Your Instagram
Tutorials

How to Take Amazing Photos for Your Instagram

...

by 121clicks
April 14, 2025
Print Management Solutions for Photography Enthusiasts
Tutorials

Print Management Solutions for Photography Enthusiasts: A Beginner’s Guide

...

by 121clicks
March 28, 2025
Load More
Next Post
Showcase of the Week – Peter Levi

Showcase of the Week - Peter Levi

Please login to join discussion
121clicks.com

121clicks.com is a global platform celebrating the art of photography, showcasing inspiring works from talented photographers around the world. We bring you breathtaking photo stories, creative tutorials, and expert insights to fuel your artistic journey. Discover, learn, and get inspired — one click at a time.

© 2025 121clicks.com – All rights reserved.

No Result
View All Result
  • Inspirations
  • Showcases
  • Photo Stories
  • Others
    • Tutorials
    • Art
    • Articles
    • Interviews
    • Animals
    • Funny
    • Design
  • Pages
    • About 121Clicks.com
    • Contact Us
    • DMCA REMOVAL
    • Privacy

© 2025 121Clicks.com - All rights reserved.