Hello Everyone, this Soumya Sumitra Behera (shortly call me SouSuBe) an enthusiastic budding photographer from the French Heritage town of Pondicherry. And here I would like to give you an small introduction and tutorial on how to take beautiful Macro photographs with the best alternative to Macro Lens.
From the inspiration of Thomas Shahan and the technique he used to produce high Magnification Photography of small world living creatures, today I’m going tell you about Reverse Ring and Extension Tube Techniques. These techniques are proven to be effective towards close-up photography and great for starter who love the tiny world.
What is an Reverse Ring?
A Reverse Ring is an metal ring mount, which has a dedicated camera mount on one side and a threaded mount with dedicated diameter. To bring you a clear view of how it works , just recall the principle how a lens covers a large view of the subject and captures down to a small area at the sensor. The same thing is just reversed – when a lens reversed, objects that appears to be smaller at the Back end, is magnified to a larger view at the Front end. Simple Isn’t it.

What is an Extension Tube?
As the name implies, It’s a hollow empty tube, that extends the distance between your camera (sensor) and the optical lens. It has a lens mount in one end and camera mount at the other end. To know how it works, first let’s see the focusing characteristics of a lens.
Lenses can either be a zoom or a prime. But every lens have an element to focus, either internally or externally. For a lens, to take high magnified image of tiny objects, is by how close the lens can focus. The closer the lens can focuses, the magnified image is produced. Not every lenses have the same focusing distance and not much lesser. Hence, the lenses with lowest/closest focusing distance are known to be Dedicated Macro Lenses.
The shorter focusing ability of a lens is attained by how far the front (focusing glass) element could be moved away from the focal point(the sensor). Hence, this is attained by adding this Extension tube between the body and the lens.
Extension Tubes comes in two types of constructions – without Focusing ability and with Focusing ability and various lengths like 12mm, 20mm and 36mm in one package. The ones without AF ability in much more inexpensive compared to the ones with AF. These are also being used by Wildlife Photographers to reduce the minimum focusing distance of large telephoto lenses to make it to there convenience. (when birds or animals are closer than they expected). Alternative to the inconvenient fixed lengths of the tubes, some photographers use Macro Bellows, which works on same principle, but provides a excellent control over magnification.
In both the above methods, we lose the convenience of Auto Focus and Aperture Control. Still the sacrifice is valuable and the result is spectacular.
Now, let’s see how to take pictures with it. All you may need…
- A Good DSLR with loaded battery and Memory card
- Kit lens.
- Reverse Ring or Extension Tube
- A Flash with bouncer or diffuser
- Sturdy Tripod if required
- Lots of Patients
- Off course a good eyes to compose and finger to trigger
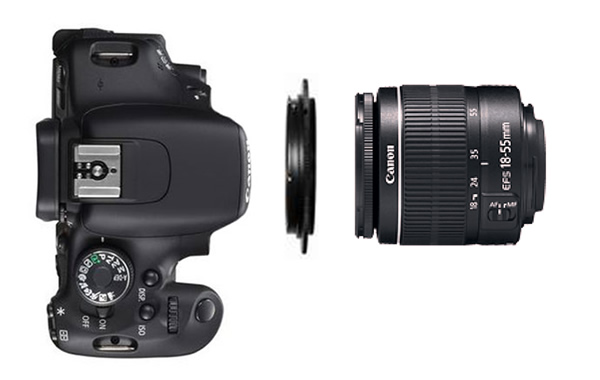
Macro with Reverse Ring (Crop Sensor Camera and 18-55mm Kit Lens):
- Before mounting the reverse ring, set the aperture around f/8-f/11 to get a sharper and better focal plane.(OR)(Recommended) Set the aperture in camera, and remove the lens with DOF button being pressed. (found beside the lens in most camera body)
- Set the Shutter speed to 2-4 sec (time, you would take to remove the lens) and remove the lens. This is to set the aperture, even after it is removed. (you could see the aperture blade closed down)
- Now, mount the threaded side of the reverse ring on the front element of the lens.
- Switch to MF mode in the lens. IS or VR doesn’t matter.
- Now, mount the lens revered and zoom to 55mm.
Now the setup is complete. Find some good place to shoot with lots of light since you are cutting down to f/8. Some times, you will still need a extra light which I compensate with external flash bounced and diffused towards the subject.
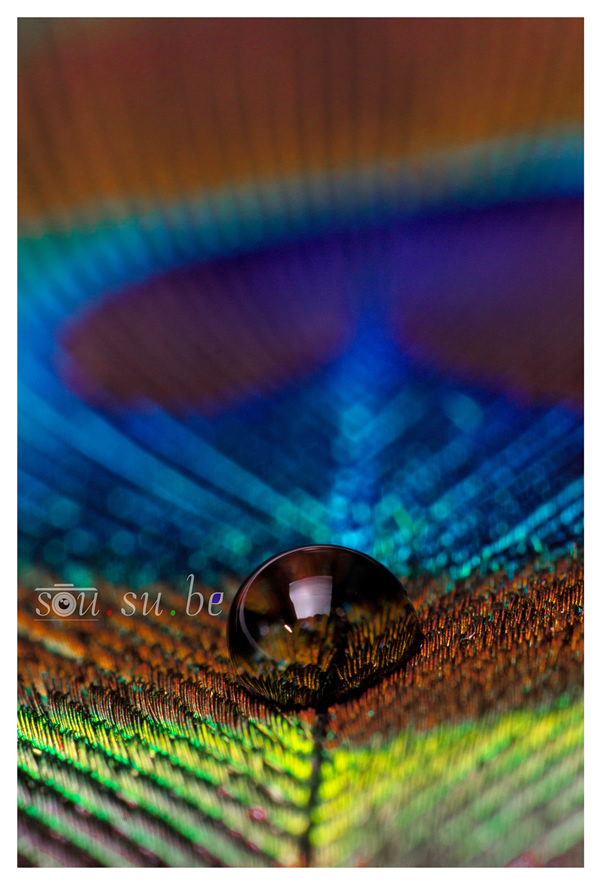
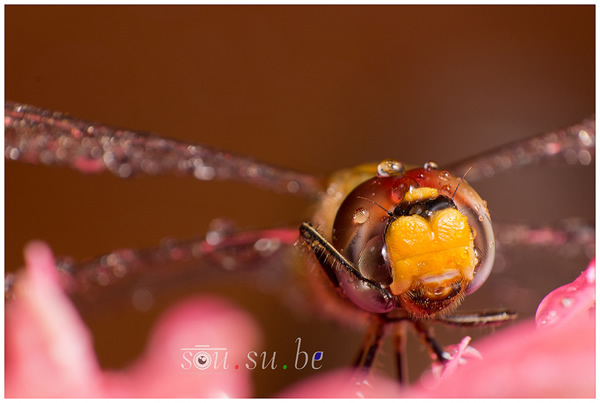
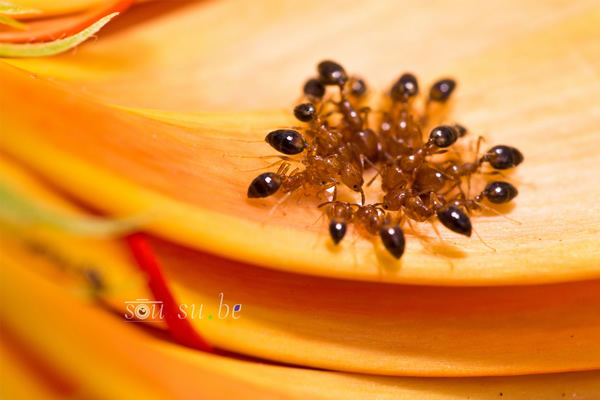
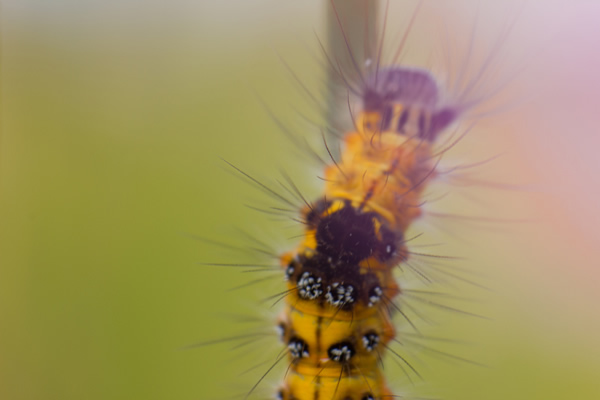
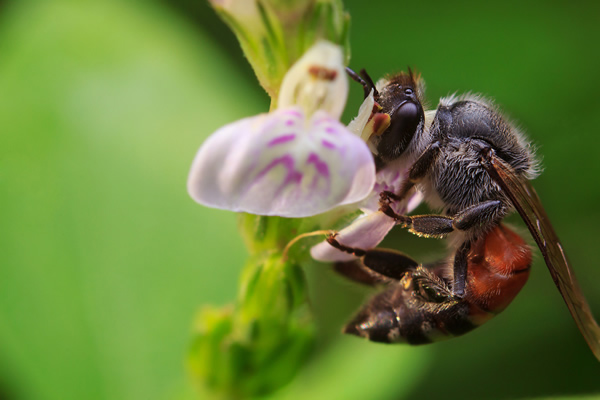
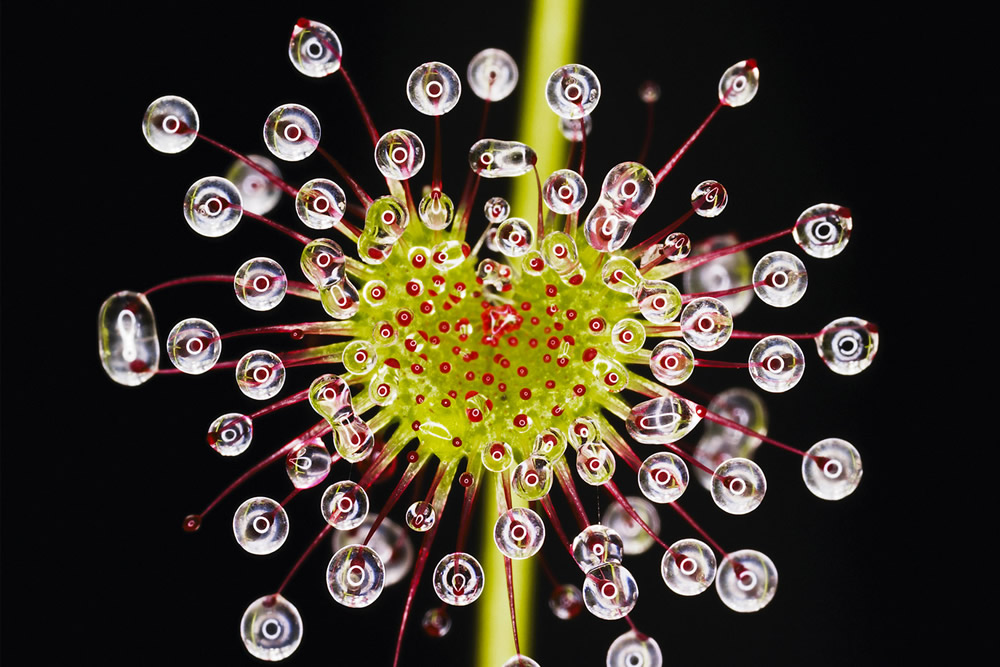
The results I tried with my Canon EOS 600D and reversed 18-55mm are here.


Macro with Extension Tube (Crop Sensor Camera and 18-55mm Kit Lens):
- Set the aperture same as said in first step in Reverse Ring method. But, if you are stacking all the three tubes together, you have to close down to f/16 to get better focal plane.
- Now , mount the tube on the body and the lens on the tube.
- In this method, you will need an external flash mounted with a bouncer. You can also use a ring flash if you have got one. Without a Flash Light its harder to shoot.
You are now ready to get down to the field. You have to be very patient and sturdy to get those nice shot of magnified eyes of those beautiful creatures.
You can also mount the entire setup on a tripod and wait for the scene. But, it’s recommended to avoid tripod, unless you are shooting still images.
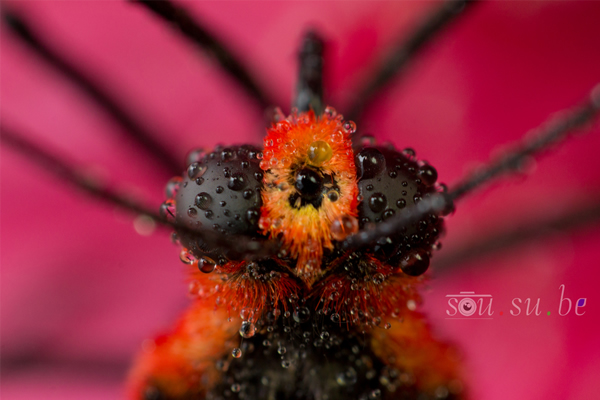
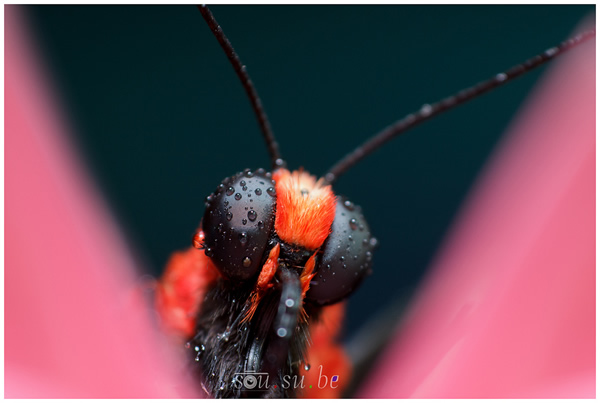
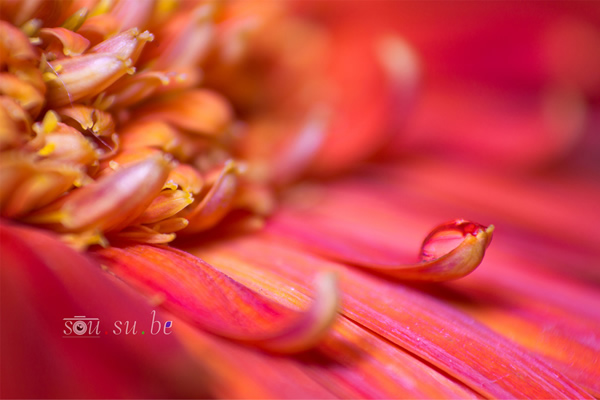
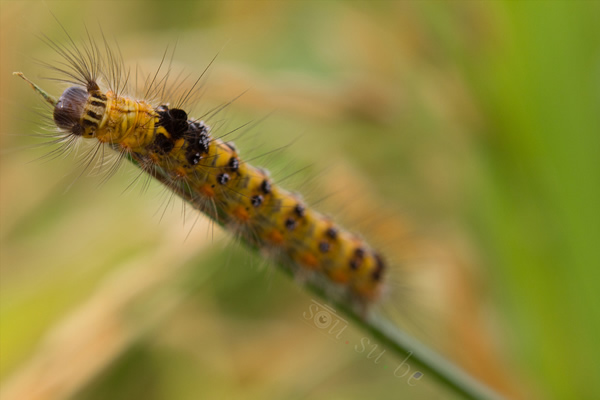
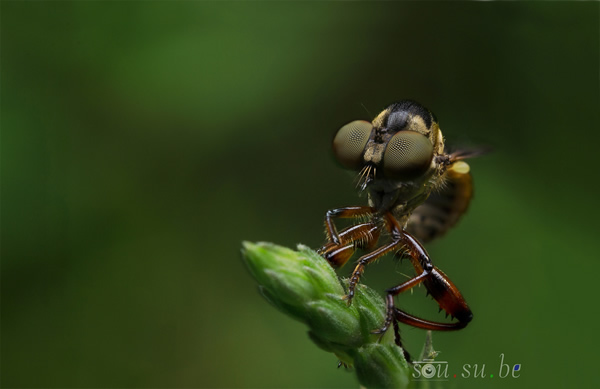
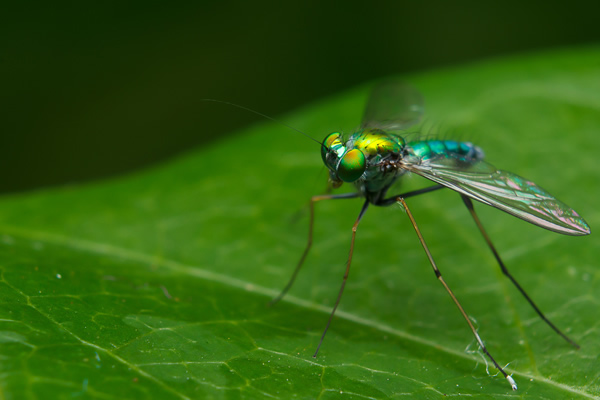
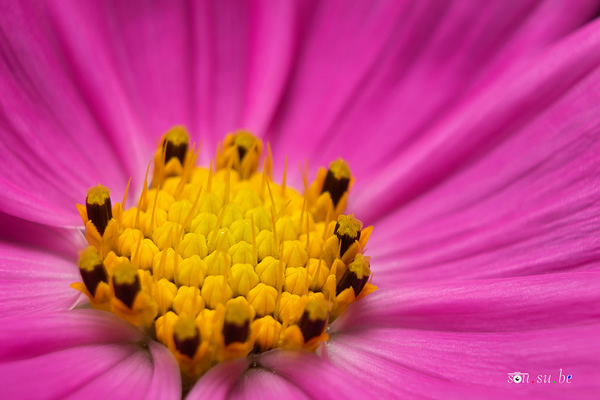
The results I tried with my Canon EOS 600D, 18-55mm and 50mm together with extension tube are here…

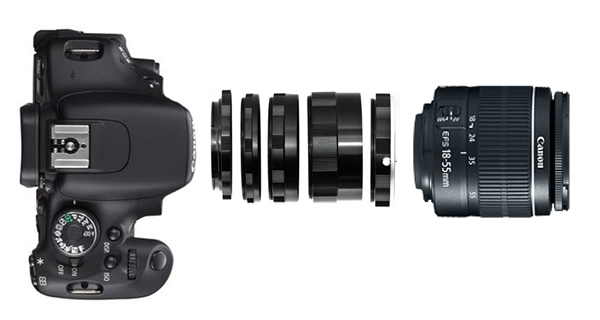
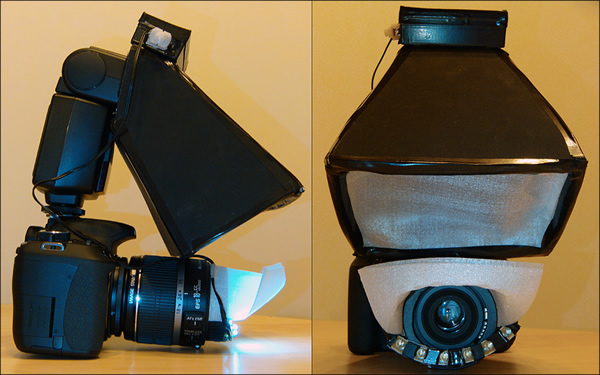
My Typical Macro Photography Setup:
Conclusion:
For people who are interested in macro photography or a beginner to macro and want to take some jaw dropping pictures with inexpensive gears without a dedicated macro lens, it is recommended to have those tubes with just a beginner level DSLR together with the kit lens. All you need is lots of patients and persistence. Even after hours of time, you may not get a single picture. Together you have to be very keep in finding your subject, since they are in very tiny world.
Hope you a like this tutorial.
You can find Soumya Sumitra Behera on the Web :
Copyrights:
All the pictures in this post are copyrighted Soumya Sumitra Behera. Their reproduction, even in part, is forbidden without the explicit approval of the rightful owners.

4 comments
Great. Thanks a lot
A very Good & Easy to understand Explanation of Macro Photography.Thank You.
Till now the best n most elaborated article on micro photography
Hi Soumya,
Excellent article indeed!
I’ve tried almost all options you’ve illustrated here, and wondering which lens will give more magnification while
1. Reverse mounted and
2. Extension mounted.
Can you please clarify me?