In this tutorial I will explain step by step how to create Selective Color with Gradient Map in Photoshop. This is very simple tutorial, you can try it quickly in Photoshop. Let’s get started!
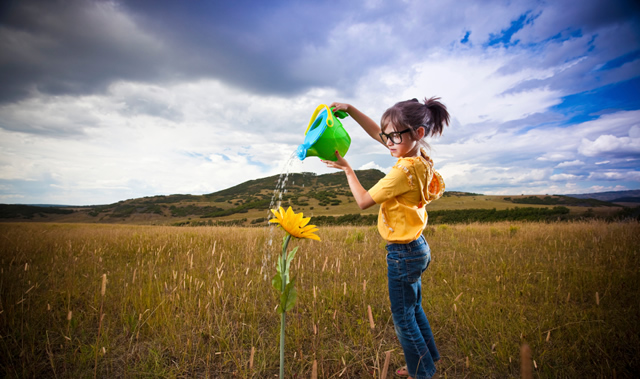
Step 1
Start with the photo you want to apply the technique, Open in Photoshop.
Step 2
Duplicate your Original Layer as below:

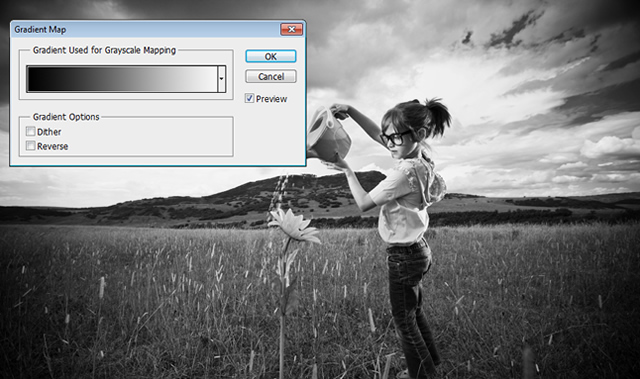
Step 3
Now Set your Foreground color to Black, and Background color to White. Go to Image >> Adjustments >> Gradient Map and press OK.
Step 4
Pick eraser tool from tool box and start erasing on your subject. In this Image we will erase the Girl and Plant.
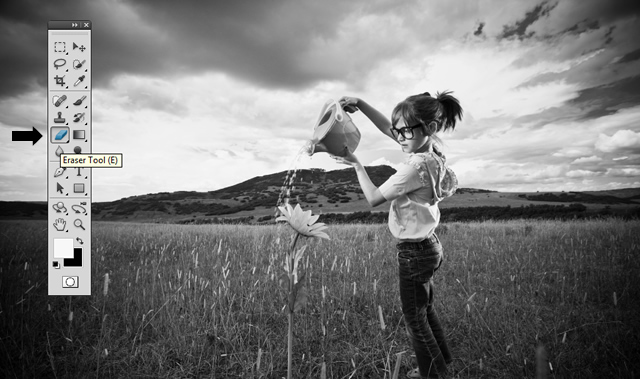
Step 5
Now… zoom the picture, set your brush size and carefully erase your subject as below. While you are erasing edges of subject, reduce your brush size.

Step 6
Now, you can adjust the levels if you want. We’re done with Selective Color using Gradient Map.
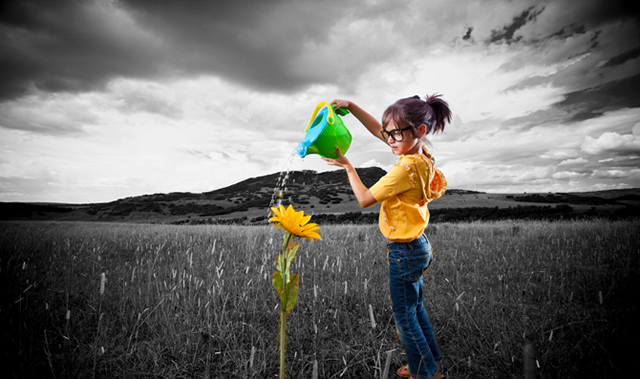
Before and After
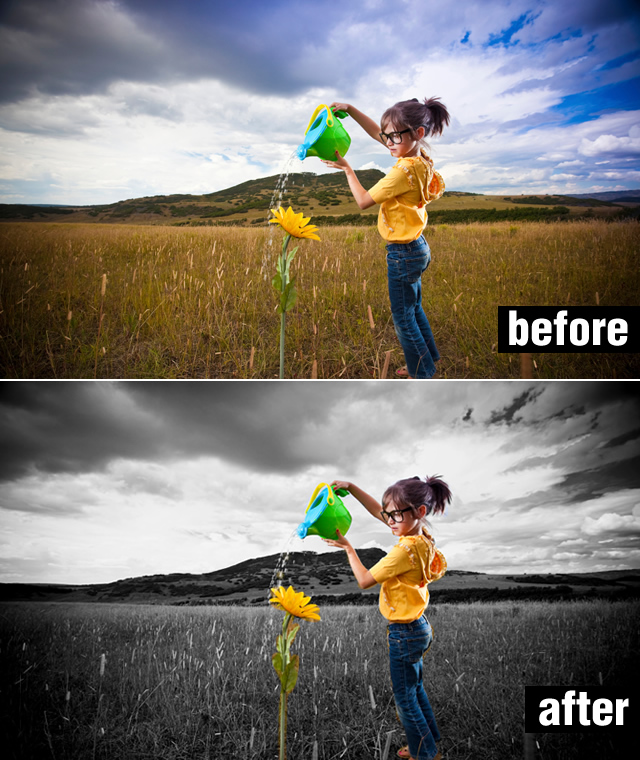
Image Source: IStockphoto


3 comments
Simple and nice. Great Tip
Superb..! it really helped me
Glad you like this.